
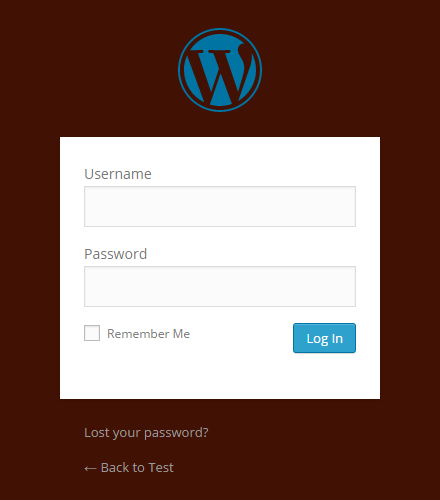
In this tutorial we are going to learn that “How to Create a Custom WordPress Login Page“. In WordPress you can customize everything but here we are going to take a look at WordPress built-in login page. Here is what we’ll create in this tutorial.
What we will do?
- Add a Custom Background.
- Replace the WordPress Logo with our Custom Logo.
- Customize the look of Login Form.
- Change the Login Logo URL.
- Remove the “Lost Password” link (if you want).
- Remove the Login Page Shake.
- Change the Redirect URL after successful Login.
- Set “Remember Me” to be Checked.
The login page isn’t a part of theme setup. So WordPress don’t load your theme’s stylesheet on that page. But that’s OK. We will make our own stylesheet for custom login page. I’ll suggest you to make a new folder in your theme directory i.e. your_site_folder > wp-content > themes > your_theme_folder_name. So you have to make a new directory with name “login”.
So first make a new stylesheet with name login-styles.css in login directory (that we have made above).
We have to tell WordPress to load this CSS file so open up your theme’s functions.php file and add the following code:
function custom_login_css() {
echo '<link rel="stylesheet" type="text/css" href="'.get_stylesheet_directory_uri().'/login/login-styles.css" />';
}
add_action('login_head', 'custom_login_css');
Now let’s start Customization.
Add a Custom Background
By default, WordPress adds a .login class to the body of the login page, so you can use this class to add your own background.
Add the following CSS to the login-style.css file:
body.login {
background: #411103;
}
You can change color as your requirement or you can also make a image as your background but remember to upload your image in login directory and write path as “../login/your_image_name.png”.
The login page look like this:
Replace the WordPress Logo with our Custom Logo
By default, there is WordPress logo above our login form. We can change it with our custom logo. We’ll use .login h1 a class to add our own custom logo. Upload your own logo to the /login directory and take note of its height and width.
Then add this code to your login-styles.css:
.login h1 a {
background-image: url('../login/logo.png');
background-size: 300px 72px;
width: 300px;
height: 72px;
}
Replace the background size with the dimensions of your logo and also replace the logo.png with your logo name.
Now login page will look like:
Customize the look of Login Form
OK now we are going to take a look at Login Form style like buy propecia online. I have add what I like but you can style your self if you know CSS. If you like my design then you can copy my style.
Add following code in you login-styles.css:
.login form {
	margin-left:auto;
	margin-right:auto;
	padding:40px;
	border-radius: 10px;
	background-clip: padding-box;
	background: #718FC8;
	overflow: hidden;
}
Now we will change our text color
.login label {
	color: #FFF;
	line-height: 26px;
}
And now style our Log In button
.login .button-primary {
	float:right;
	background-color: #518AA4;
	text-shadow: #333333 0 1px 0;
	color: #FFF;
}
.login .button-primary:hover {
	background-color: #08385C;
	text-shadow: #333333 0 -1px 0;
	color: #fff;
	text-decoration: underline;
}

.login .button-primary:active {
	background-color: #08385C;
	text-shadow: #333333 0 -1px 0;
	color: #fff;
}
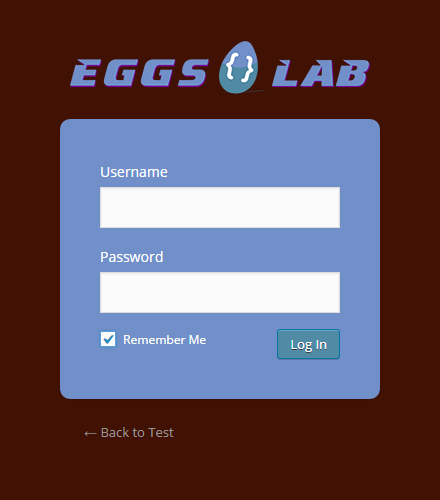
So now we have the following look

Change the Login Logo URL
By default, the logo is link to wordpress.org but we can change it and link it to your site. So open your fucntions.php file in your themes folder and add the following code:
function my_login_logo_url() {
return get_bloginfo( 'url' );
}
add_filter( 'login_headerurl', 'my_login_logo_url' );

function my_login_logo_url_title() {
return 'Your Site Name and Info';
}
add_filter( 'login_headertitle', 'my_login_logo_url_title' );
So now the logo is link with your site.
Remove the “Lost Password” link
The “Lost Your Password?” link is helpful if you’ve lost your password, but if someone has hacked your email they will be gable to get hold of your WordPress password and take over your site.
So to remove this link add the following code to your functions.php file:
function remove_lostpassword_text ( $text ) {
if ($text == 'Lost your password?'){$text = '';}
return $text;
}
add_filter( 'gettext', 'remove_lostpassword_text' );
Remove the Login Page Shake
Some people are very annoying from WordPress shake alert. To remove this shake add following code to your functions.php file
function my_login_head() {
remove_action('login_head', 'wp_shake_js', 12);
}
add_action('login_head', 'my_login_head');
Change the Redirect URL after successful Login
When user logged in on your site he will redirect to dashboard of site instead of home page. You can change this redirection by adding the following code:
function admin_login_redirect( $redirect_to, $request, $user )
{
global $user;
if( isset( $user->roles ) && is_array( $user->roles ) ) {
if( in_array( "administrator", $user->roles ) ) {
return $redirect_to;
} else {
return home_url();
}
}
else
{
return $redirect_to;
}
}
add_filter("login_redirect", "admin_login_redirect", 10, 3);
From this code all users other than admin are redirected to home page.
Set “Remember Me” to be Checked
The “Remember Me” is unchecked by default. But you can change it by just adding the following code to your functions.php file:
function login_checked_remember_me() {
add_filter( 'login_footer', 'rememberme_checked' );
}
add_action( 'init', 'login_checked_remember_me' );

function rememberme_checked() {
echo "<script>document.getElementById('rememberme').checked = true;</script>";
}
That’s all!
Have you customized your login page? Show us what you’ve done in the comments below.


keep it up……..